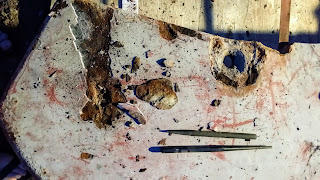
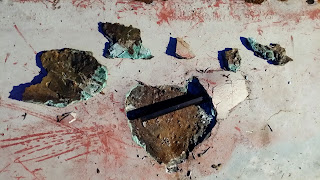
After dropping the keel out from under her it became apparent that work had been done in the past. Further examination showed that someone had attempted to use fiberglass and resin to repair the corroded pivot hole in the keel.
Please take a moment and think back to your junior high science class and recall Mohs scale of mineral hardness. At least, that's when I learned if it, from Mr. Richter. He also had us demonstrate erosion by putting some chunks of limestone in an empty milk jug, with some water, then shaking it while listening to In-A-Gadda-Da-Vida by Iron Butterfly. But I digress.
We are dealing with three materials here, cast iron, bronze and glass fiber. I'm ignoring the resin because it is so much softer than everything else involved. At most it forms a binder to hold the fiberglass in place. On Mohs scale which is hardest? Use this table for a reference, in case you don't have it memorized.
1.5 Tin
3 Copper
4 Iron
5.5 Glass
Hardness does not necessarily equate to abrasion resistance, and there are alloys and treatments that will make any of these materials harder or softer, but in this case hardness gives us a reasonable idea of each materials abrasion resistance. I hope you've spotted the problem. Attempting to shim the pivot hole wear with fiberglass wasn't going to fix it, in fact it made it worse over time, as the fiberglass wore away at both the keel and the pivot pin.
Here are a few pictures of the pivot pin, showing a whole lot of wear and abuse. It's clear that at some times it pivoted in the hanger and wore that way, and at other times the keel wobbled on it, wearing a dent into one portion.
Now, back to that first picture, if a sealer was used on the metal before the fairing compound was applied, it has clearly failed. I don't think one was used. The fairing compound is porous, so it acts like a sponge when it gets wet, and holds water. Water contains dissolved gases, including oxygen, as well as being made up of 1 part oxygen for two parts hydrogen (H2O.) Oxygen and iron are very attractive to each other, and will gladly combine to form various iron oxides, also known as rust. Depending on how many Fe and O atoms combine to form the iron oxide molecule you will get different forms of iron oxide. The red rusts we see so often have a lot of oxygen and less iron, black iron oxides, like hematite and what I found on the keel, under the fairing compound, have less oxygen and more iron. All of them take more volume than the iron did before it oxidized, that's why you see blisters when rust forms under paint. The same could be seen on the keel.
 |
| Along the trailing edge (top of the picture) the corrosion was so bad that the fairing compound and paint had completely cracked off of the keel. |
It didn't continue so easily.


Wow! You've taken on a very big project!
ReplyDelete