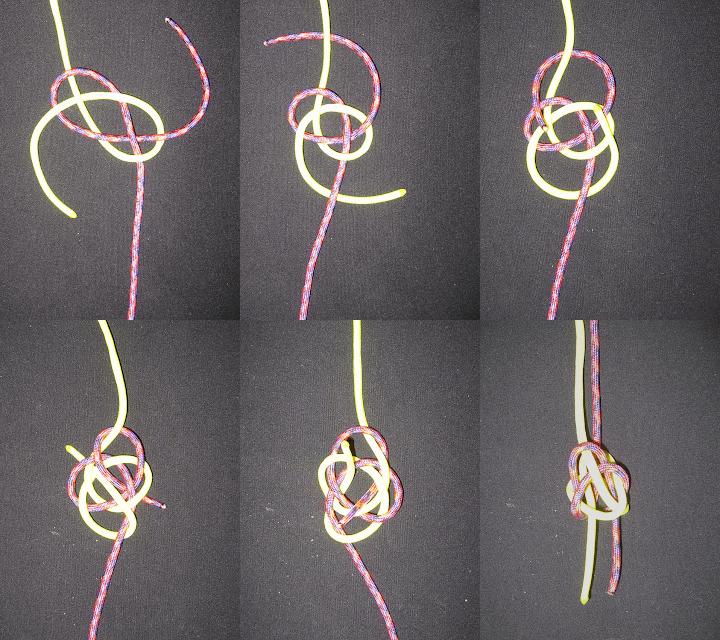
This knot can be tied between two pieces of line, but is more commonly tied on a bight, between the ends of a single line. Above are several tied in lengths of paracord to use as key fobs or zipper pulls.
The other end is drawn under the bight with the free end pointing into the bight. Opposite of the first end.
Now over the first standing end.
Then under the first free end and pointing back toward it's own standing end.
Now over the bight.
Under itself, in the middle of the bight. and over the other end of the bight.
Tidied up it you will see a double carrick bend.
your free and standing ends are opposite each other.
the free end goes under the opposing standing end, continuing the curve in the same direction.
This image may be a bit confusing, the free ends are tucking down the hole in the middle of the knot.
Here the knot has been turned over, so the free ends are coming up through the knot. It's now time to start fairing the knot.
smooth the knot back toward the standing ends and begin snugging it up. I like to shorten the free ends, working the slack back through the knot and into the standing end.
For this example, I did it the other way, working the slack out to the free ends, see how they have gotten longer.

No comments:
Post a Comment